Supplemental Exercise
- Categories:
- All
- Articles
- Designing
- Drawing
- Effects
- Interface
- News
- Photo Effects
- Text Effects
- Web Roundups
 How to Break Sunlight Through the Clouds
[/url]
In Photo Effects by Kyle Pero In this tutorial I will show you how to turn an overcast day into a stunningly dramatic scene with sunlight breaking through the clouds. This technique can be used for other applications as well. I originally came up with it when I needed to create shafts of light coming through a canopy of trees. The best part of this technique is that the beams are created from the actual imagery so they look very realistic. Lets get started...
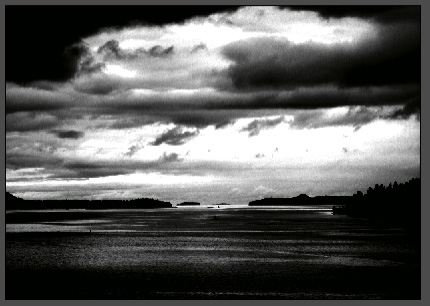
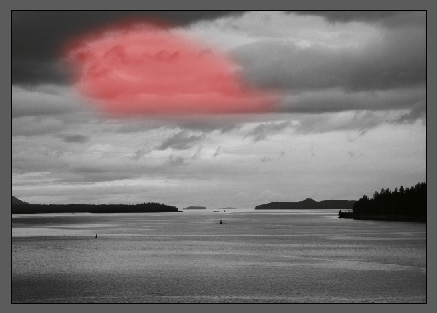
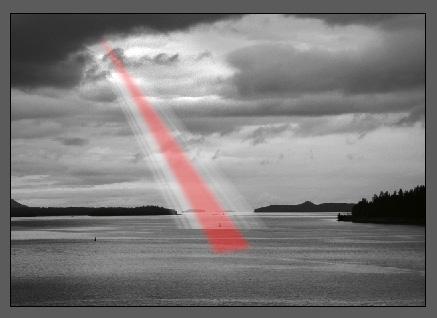
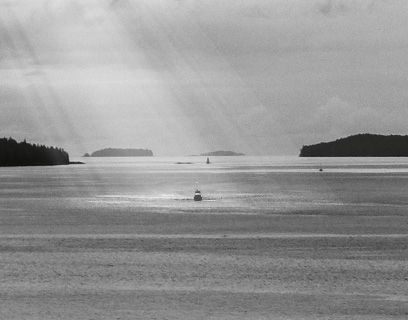
Before & After:Here's the photo we're working with

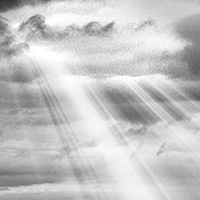
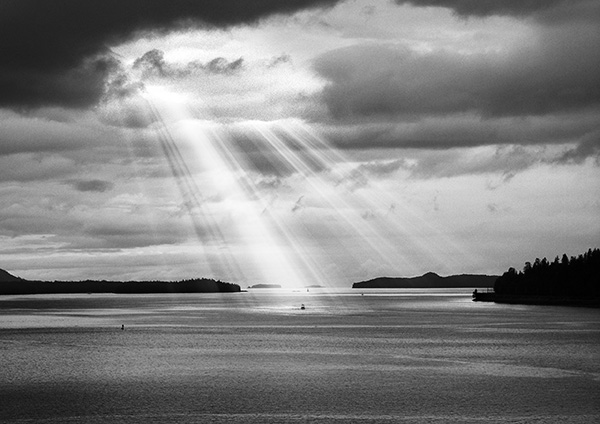
And here's what we're producing (Click the image for a larger version)
 Step One:
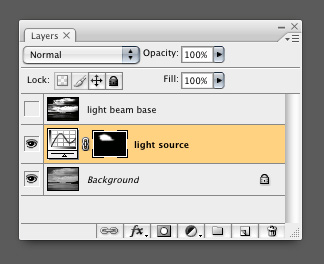
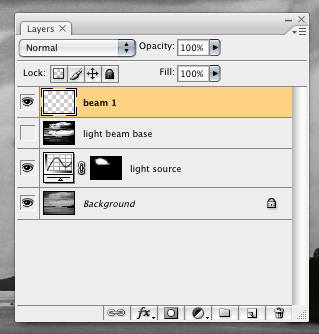
Duplicate the Background photo layer by dragging it to the New Layer Icon at the bottom of the layers palette. Name it
'Light Beam Base'.
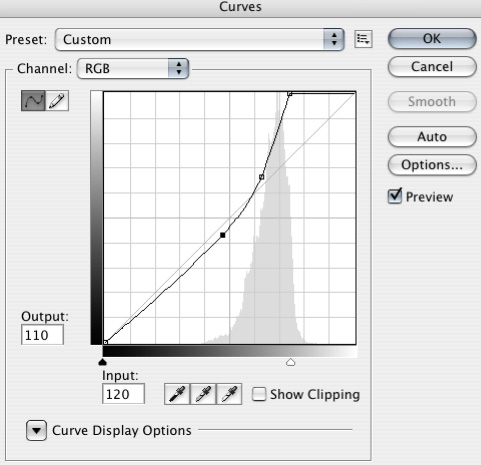
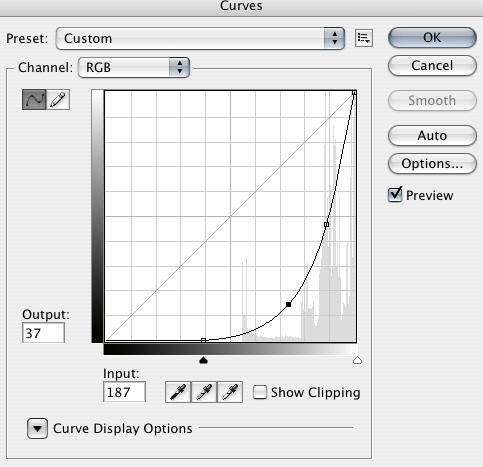
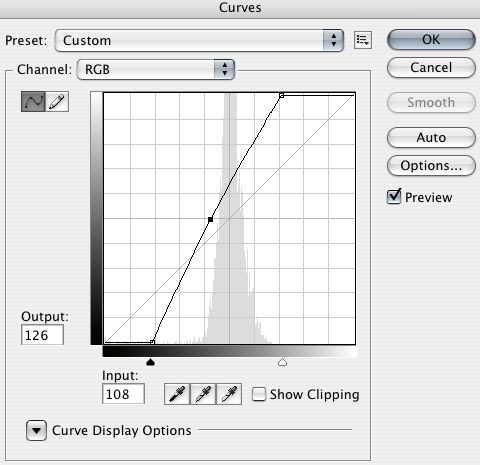
With that layer selected hit
CMD + M (or
CTRL+M on PC) to apply a curve to it. Apply a harsh curve to it so that we have maximum contrast in the clouds with small areas that go completely white. I am focusing on the area on the top third of the frame slightly to the left. These white areas are going to be where our beams of light come out of the clouds.

Now apply a 2 pixel gaussian blur to that layer (
Filter > Blur > Gaussian Blur ).
 Step Two:
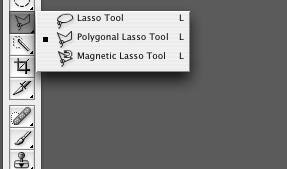
Turn off the Light Beam Base layer and select the Background layer. Select the
Polygonal Lasso tool (L). Set the
Feather to 50 in the Properties bar at the top of the screen.
Draw a loose selection around the area of the sky where the beams will come from by clicking various points. Here is the selection I made as viewed in
Quick Mask mode:
Make a new
Curves Adjustment Layer just above he Background layer. Our selection is automatically applied as a layer mask. Apply a similar curve to the one we did before, but this time we want to limit it so the shadow areas are not affected. Name the layer
'Light Source'.

 Step Three:
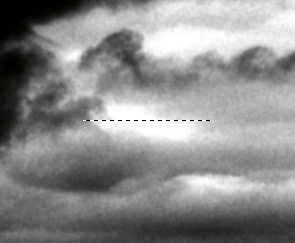
Turn on and select the Light Beam Base layer. In the toolbar select the Single Row Marquee tool. Zoom in on one of the white areas of the clouds and click once in the middle of it. This selects a single row of pixels across the image.

Zoom out so you can see the whole image. Select the regular
Marquee tool. While holding alt/option drag from the left of the image right up to the left side of the white area to deselect those pixels. Do the same on the right side. You shoud end up with a selection of a single row of pixels just across the white area like so:
With the 'Light Beam Base' layer selected hit
CMD + J. This throws your selected pixels on a new layer. Name that layer
'Beam 1'.
 Step Four:
Turn off the 'Light Beam Base' layer. Select the 'Beam 1' layer. Hit
CMD+T to Free Transform the layer. Grab the bottom center handle and stretch is all the way down to about where the boat sits. Now while holding CMD drag the same handle to the right so it sits just under the boat. Now while holding
CMD+SHIFT drag the bottom left and right handles outward until you get a shape that you like.
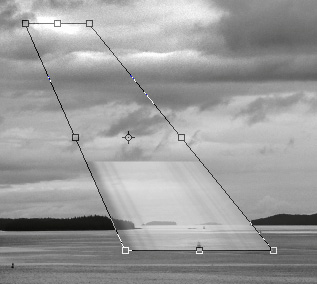 Note that the Free Transform preview might look a little whacked because Photoshop is dealing with a single row of pixels. This technique is called pixel stretching. When you apply the transform it will look right.
 Step Five:
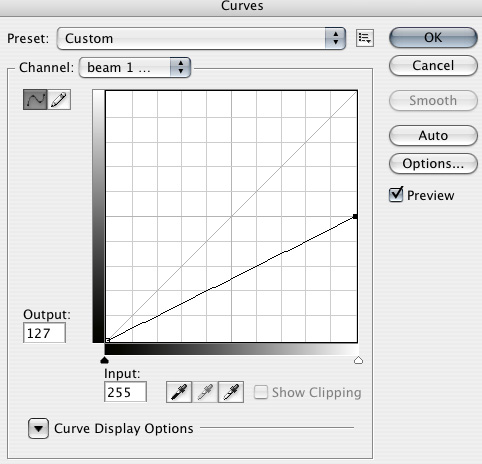
Set the 'Beam 1' layer's blending mode to Screen on the layer palette.
Hit
CMD+M to apply a curve to the layer. Darken the layer way down until the beams of light start to show up.
Add a layer mask by clicking on the
Add Layer Mask button at the bottom of the layer palette. Select the mask by clicking on it in the layer palette then hit CMD+M to apply a curve to it. Bring the highlight point down to 50%. Hit OK.
Select the
Polygonal Lasso tool (L) and set the
Feather to 15 this time. Select the center of the beam all the way through. Here is what my selection looked like as a quickmask.
Select the 'Beam 1' mask and hit
CMD+M to apply a curve. This time bring the shadow point up to 50%. This will make the center of the beam brighter than the edges.
 Step Six:
With the mask still selected, hit G for the Gradient tool. Click on the gradient preview in the top left of the screen and set it to the black to white gradient if it isnt already set. Set the gradient mode to Multiply on the Properties Bar.
Drag from the top of the beam to the bottom. Before you click anything else go to
Edit > Fade Gradient. Fade it down to about 50%. This creates a falloff on the beam but we use the Fade function so it doesn't completely disappear at the bottom.
 Step Seven:
Select the Background layer. Select the
Eliptical Marquee tool. Click and drag directly on the boat, while holding down the mouse button hold ALT and make a narrow ellipse at the base of the beam.
Hit
Q to enter Quick Mask mode. Go
Filter > Blur > Gaussian Blur and use 5 as the radius. Go
Filter > Blur > Motion Blur and make the angle 0 and the distance 150. Hit
Q to exit Quick Mask.

Make a curves adjustment layer just above the Background layer. Lighten up the water a bit until it looks like the beam is hitting the water.
 Step Eight:
I just want to add a little contrast to the image as a whole. To do that, put a curve at the top of the layers palette and just add some contrast.

Repeat steps 3 through 7 as many times as you would like using other white spots in the clouds but be sure to mind the angles at which the beams come down. They should look like they all come from the same light source. I did 3 different beams to create my image.
Update - Colour VersionYou can see a colour version of this effect in the follow-up post - More on Beams of Light, This Time in Colour. PSDs for both colour and black and white are available in the PSDTUTS Plus download area.